As I upgraded the render pipeline for the game, I noticed that my custom shadow rendering shaders turned pink. It was time to transition from custom HLSL shading for the environments to a more modern shader graph based approach.
Creating the scene
I had generated the Midjourney image for this scene already way back in January! 9th of January to be precise. I have a lot of images in the backlog, just waiting to get implemented in the game!
Prompting
I did some experimentation with isometric and “normal” views for the apartment block exterior. But ultimately ended up choosing a normal version as I liked how it would make the final scene feel.


I close a moody version with a large door gaping open. Usually I choose these locations based on how understandable different exits points in the image are. This final image was not perfect, but I stuck with it anyway. I did not know it then, but 6 months later I would be able to extend and edit the image without loosing what drew me to this generation in the first place.

Set extension / editing
The image did go trough some heavy set extending and editing in Photoshop though! This editing was done back in July.
Nothing about this scene exited me too much then, but now that I have finished it, it become one of my favourite scenes!

The original image is just a small potion of the middle of the final creation. I was really surprised that I managed to create the underpass on the right with generative fill. I did have to do it in very small pieces and overlay concrete textures on the walls to bring in some of the details. The end result, I think, is very pleasing. I might add another exit to the screen left if one is required.
Custom shadow pass

For the shadow pass, I simply painted out the light hotspots in the image. This is important for the custom shadow material.
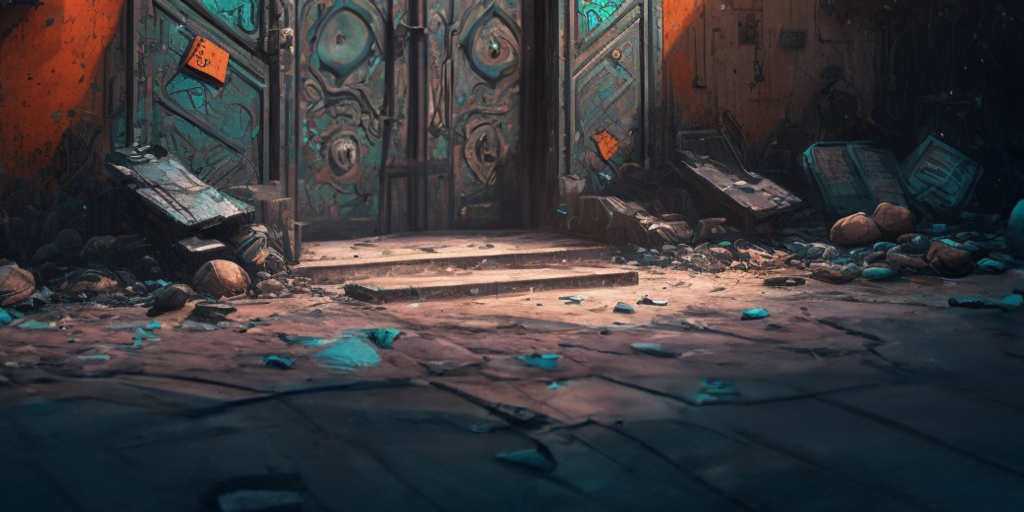
My workflow for this is first to use color picker to sample colors from the shadow areas or the image and paint over the direct light on a new layer set to darken mode. This makes sure I do not paint over the original shadows of the image, just add shadow on the already lit areas. The end result from this step is an overly smooth and low detail version of the shadows. It is not pretty.
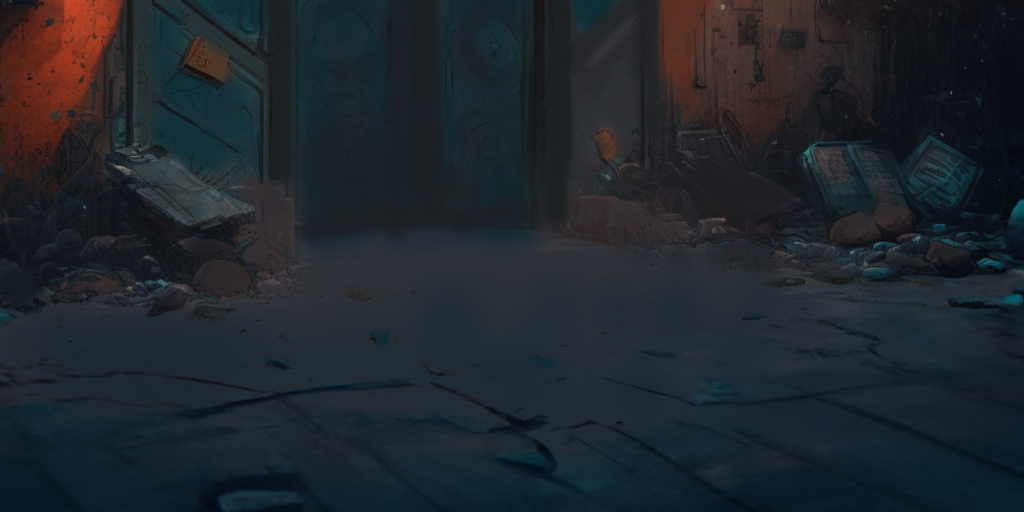
To fix this, I take a duplicate of the original, normally lit image and pipe it trough a high pass filter.

This image is then overlaid it on top of the darkened shadow layer with a clipping mask and set to overlay blend mode.
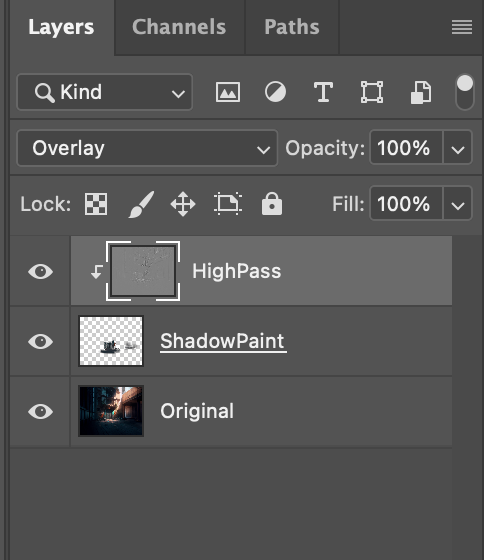
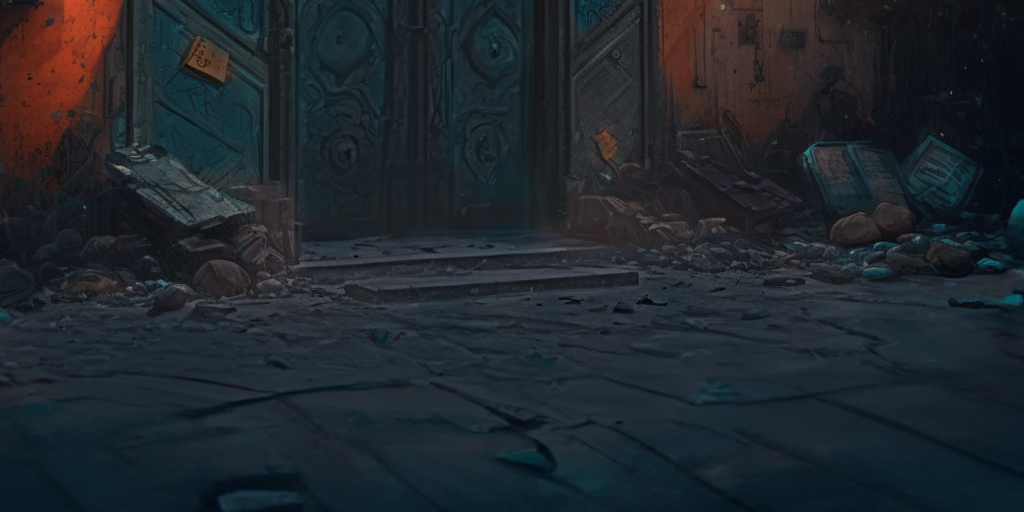
I find that this workflow produces passable results in no time. The shadow pass does not need to be perfect anyhow, as you can only see it in the character shadows.
3D Modeling
First, the scene is reverse engendered in fSpy, a freeware app. This is a step I do for all on my locations. fSpy is by far the simplest piece of software to reverse-engineer camera data from a 2D image.
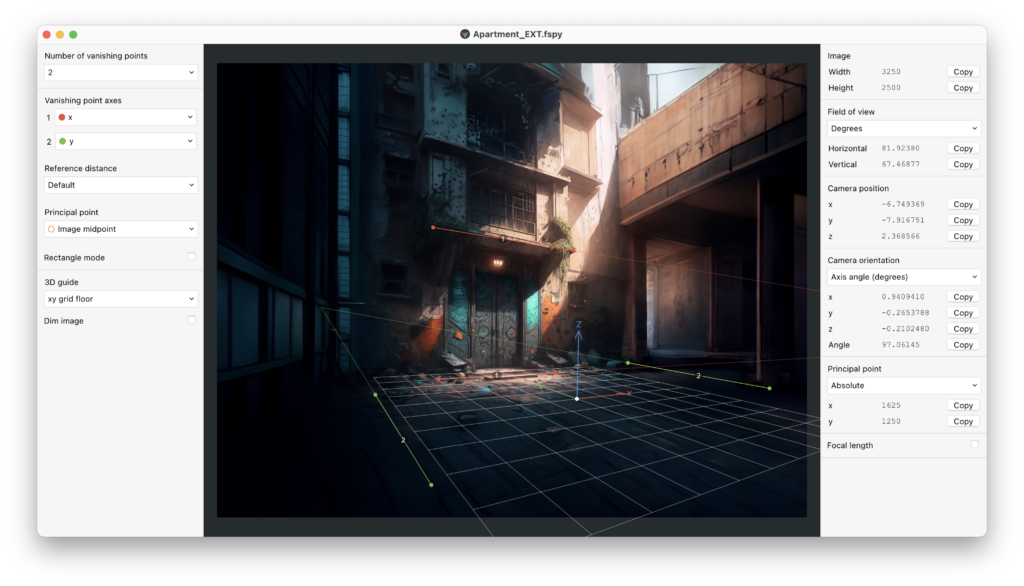
Now the scene is ready for Blender, yet another freeware app. I screen recorded the full process of turning this 2D image into very simple 3D geometry by hand and it took me 30 minutes to go from nothing to full scene with some interior bits and animatable doors.
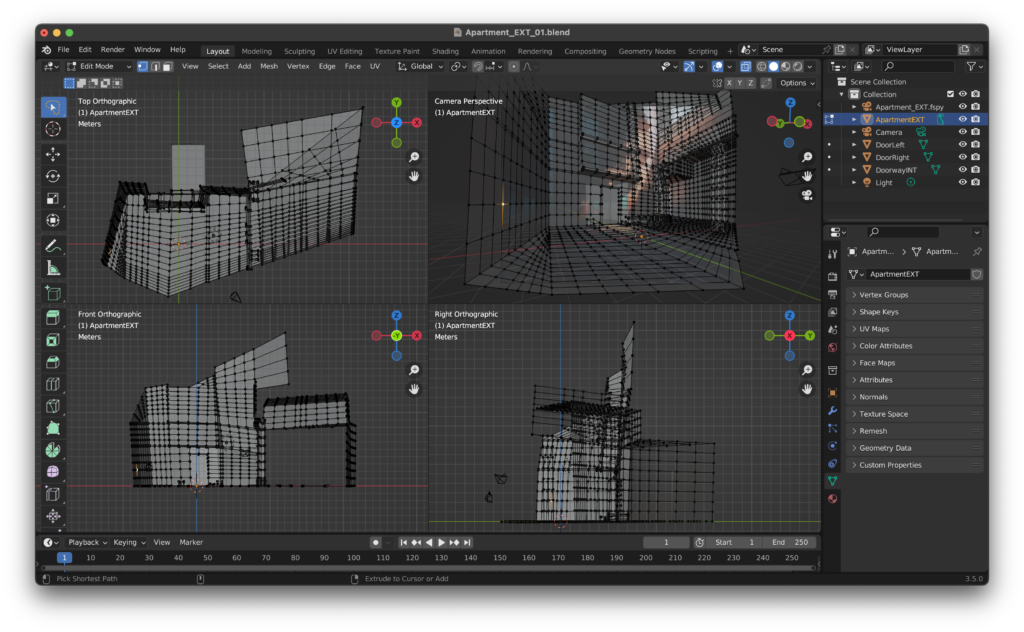
The Blender scene is very simple. I also try to never model anything outside of the camera view, so the mesh can have this distorted look.
Unity setup – spot & point lights
In unity, I now place lights in the scene. These lights are meant to motivate the lights in the background image. When they are placed correctly, a character moving in the space appears to be lit by the same lights. Point lights and spotlights are used for this pass. I use these lights because I can more easily control where they affect the character and where not.

Unity setup – directional light custom shadow mask setup
A single directional light is placed in the scene in a location where the shadows in the image line up with real-time shadows. This is the only light actually casting shadow on the painting. In this location, lining these up is pretty easy as there are some shadow casters in the scene that can be used as reference.

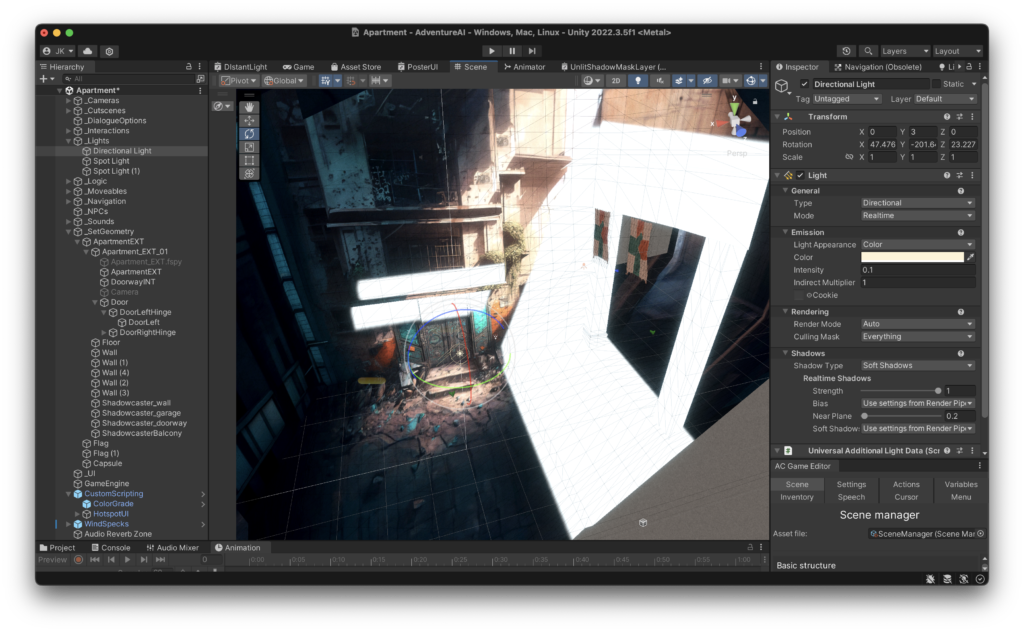
The reason for these shadow casters is to shadow the player character and also the opening doors. Shadow-casting is turned off for the level geometry as it will produce unwanted results. Custom shadow caster meshes are used instead. As you can see in the image (with the white shadow mask) there are some shadows on surfaces that should not have a shadow. But this is not an issue as the shadow mask only reveals the painted shadow map, and if there are no custom shadows painted on these surfaces, they will be fine.
Unity setup – Interactions & gameplay

At this point I also add in all the gameplay logic, navigation, animations and post process effects. I use a Unity called Adventure Creator for most of this stuff. The scene is (for now) pretty basic, with just a few exits and points of interest. Most of the complexity comes from entering and exiting the building, as it has multiple animations and sound effects that need triggering.
Unity setup – additional polish

I also adde some cloth sim flags hanging from the wall for a good measure. While I was at it, I also replaced the curtain in the bedroom window of the apartment interior with a cloth sim version. All these small details add more life into the otherwise quite static environments.
To add even more production value, I also added a short 3D camera animation for entering and exiting the building. This also emphasises that the apartment you enter trough the door is somewhere deeper in the building, as without the camera motion you could get this feeling.
Redoing the shadow material
I decided to redo the shadow rendering from scratch with shader graph instead of HLSL to modernise my solution and to make it easier for me to add more features to the shader. This would allow me to more easily create variants that had specific features fo different parts of the levels. The new location I set out to add to the game would require at least a few.
For this scene, I would also need a new feature for the shader: toon shading. As the scene contains a door that is opening and closing.
As the door opens, I want it to gradually get shadowed as the light hits the door less and less, but I wanted to also be able to control that radiation, so that the door would be fully lit, even when not completely facing the light source.
Custom light attributes reader -node
With a shader graph, the custom HLSL part of the shader got a lot simpler. This variant of the shadow masked material only supports direct lighting. I am going to add the support for point and spotlights later.
CustomLighting.hlsl
#ifndef CUSTOM_LIGHTING_INCLUDED
#define CUSTOM_LIGHTING_INCLUDED

#pragma multi_compile _ _SHADOWS_SOFT

#pragma multi_compile _ _MAIN_LIGHT_SHADOWS _MAIN_LIGHT_SHADOWS_CASCADE _MAIN_LIGHT_SHADOWS_SCREEN

void MainLight_float(float3 WorldPos, out float3 Direction, out float3 Color, out float DistanceAtten, out float ShadowAtten)
{
#if SHADERGRAPH_PREVIEW
    Direction = float3(-0.5, 0.5, 0);
    Color = float3(1, 0.95, 0.8);
    DistanceAtten = 1;
    ShadowAtten = 1;
#else
#if SHADOWS_SCREEN
    float4 clipPos = TransformWorldToHClip(WorldPos);
    float4 shadowCoord = ComputeScreenPos(clipPos);
#else
    float4 shadowCoord = TransformWorldToShadowCoord(WorldPos);
#endif
    Light mainLight = GetMainLight(shadowCoord);
    Direction = mainLight.direction;
    Color = mainLight.color;
    DistanceAtten = mainLight.distanceAttenuation;
    ShadowAtten = mainLight.shadowAttenuation;
#endif
}
#endif
This custom code is then plugged into a custom node with WorldPos Input and outputs for the light attributes: direction, color, distance attenuation and shadow attenuation.

Graph
Armed with the data from the light, we can now create fully custom lighting for the unlit material, overriding all built in URP light rendering. This allows us to mix baked in (painted / AI generated) shadows with realtime shadows seamlessly!

The current iteration of the new unlit hand painted shadow masking material has support for custom toon shading and turning the shadows on / off completely ir only from faces that are away from the light source. As the shader is now a simple graph, it is super easy for me to add more features as I need them along the way!
The light falloff on the incidence angle is fully controllable. it can be sharp and soft, encompass most of the object or only add a dash of shading on the unlit faces of the mesh.
So what this is is basically a toon shader, but by using it on a painting with painted in shadows and creating a shadowed version of that painting where shadows are only painted on the areas that were previously lit, we get a perfect blend of baked and realtime shadows allowing us to seamlessly integrate realtime 3D assets into the image.


Leave a Reply